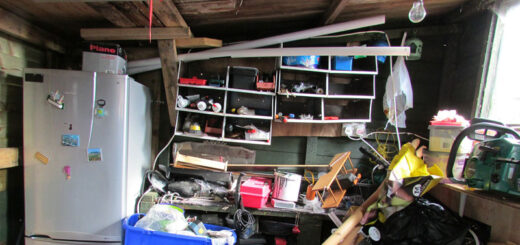
Just a drill
Once upon a time, making something was the realm of a craftsman. If you wanted to put together a wardrobe you had to join a guild, spend years in an apprenticeship, and only once you had put together the perfect wardrobe could you be called a carpenter. Nowadays, you just need a flatpack from Ikea.
Is it any wonder then that, during these days of lockdown, we all turn to DIY. Our homes need work doing. We’ve been told that it’s easy. We can’t get a man in anyway. If tightening up the bolts on a Billy bookcase is within our skillset, surely it can’t be much of a leap to whip out the powertools and start drilling holes in the masonry.
It was in this spirit that I approached mounting a bike rack on my garage wall.
To be honest, the instructions seemed pretty simple. Measure the length of the bike, mark the right height with a pencil, mark the holes, drill the holes, mount the bike. There was even a video online showing you how it’s done.
I assembled my tools. Tape measure, spirit level, ratchet, drill, pencil.
Then I looked at the bikes. We have six to be mounted. They were all different lengths.
Not to be daunted, I dutifully measured them all, selected the longest and decided to work with that. Then I just had to place the rack against the wall and measure the holes.
I looked at the wall. I looked at the rack. Then I went to watch the video again.
There was considerable detail about where to place the rack vertically. Very little about where to place it horizontally. If I placed the first one too far to the right, I would be able to get all the other bikes in without the handlebars clashing. If I placed it too far to the left, my beautiful swivel mechanism would be useless because the bike would get stuck against the supporting column.
There was nothing for it except to lift the bike vertically against the wall and attempt to mimic swing it around on its pivot.
There’s a reason you buy a special bike rack that allows you to roll the bike into it. Bikes are heavy. As I tried to manhandle the bike to an upright position, I found myself waltzing around the garage, trying to avoid my partner crashing into assorted shelving and garden tools. The thought of putting in place and testing the swivel was slightly less fantastic than the thought that I was going to coming out of this without at least a twisted ankle.
I’m a craftsman, I thought to myself. I’ll guess.
I quickly marked out the places for the holes and began drilling. It was surprisingly easy. A wise man once told me that if you’re bad at something, make up for it by getting good tools. As a result, my variable speed, hammer action drill went through the concrete of the garage wall in seconds. I tested the screws in the empty holes. Perfect. Then I put in the rawl plugs, placed the rack and began to screw it in. One, two, three. When I came to the fourth, I was baffled. The hole seemed to have disappeared. I unscrewed the rack, took it down and peered at the wall. Yup, four holes. I screwed the rack back up again. One, two, three.
It slowly dawned on me that my careful measuring of where to drill the holes might also have benefited from a slightly more careful approach in actually drilling them.
I tentatively pulled at the bike rack. It didn’t seem to move. I surreptitiously placed the screw back in the packet. Everyone ends up with bits left over, don’t they? They probably assume you’ll only need three and add the fourth one as a spare.
Tentatively, I hoisted the bike into the rack.
Nothing went wrong. It was perfect.
I stood back, observed my handy work, and felt proud. The garage was covered in dust, my tools were strewn everywhere, I had an aching back and a left-over screw, but I had managed to mount a bike in only a single afternoon.
I turned round to look at the remaining five bikes.
One step at a time, I thought, one step at a time.


Recent Comments